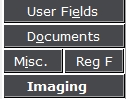
 button on the left stack of buttons.
 In Version 10, CollectMax has the following modifications to help your firm comply with the new CFPB FDCPA - Regulation F amendments.
Note: This is a Version 10 Feature. For information on obtaining Version 10 or any other optional Module, please contact the Sales Department.
The new rules will add a requirement to itemize the balance from one of 5 different Itemization dates:
Last Statement Date
Charge Off Date
Last Payment Date
Transaction Date
Judgment Date
CollectMax has a new Reg F Claim Itemization Screen to capture this data.
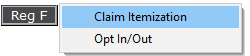
From any screen on a consumer/debtor account on the correct claim, click the button on the left stack of buttons.
A menu will be displayed, pick Claim Itemization
to display the Claim Itemization screen for this claim.
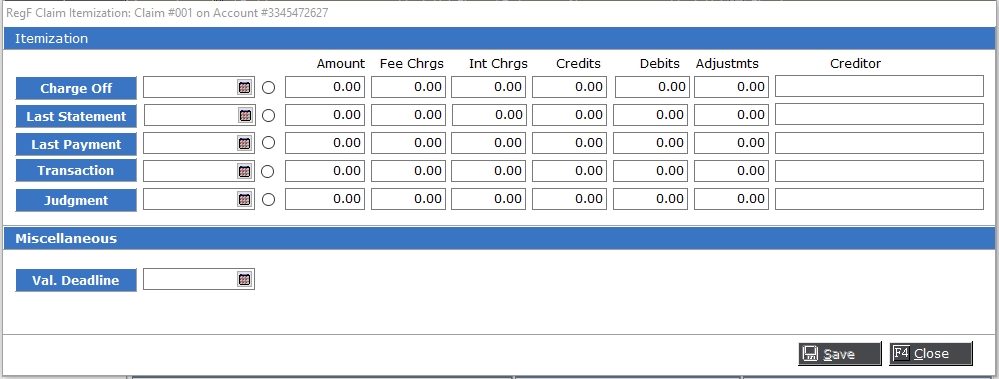
Note: This screen is claim specific. Please be sure you aligned to the proper claim before entering this screen and updating the data.
Depending on the Itemization Date, enter the date and balance information in the proper fields:
Date: Itemization Date
Radio Button: Select this button on the Itemization Row you would like the variables to pull from.
Amount: Starting Balance at Itemization Date
Fee Charges: Fees and Costs charged since the Itemization Date
Int Charges: Interest charged since the Itemization Date
Credits: Payments and credits to the balance since the Itemization Date
Debits: Debits to the balance since the Itemization Date
Adjustments: Adjustments to the balance since the Itemization Date
Creditor: Creditor at the time of the Itemization Date
Note: Some interface accounts will import this data with the placement file processing. If your Interface is not updating this screen, please check with your Forwarder to see how they are sending Reg F information and forward the file formats or specifications to Support.
In the Miscellaneous Section, the Validation Letter Deadline Date can be entered here.
While JST will not be providing a form for the Validation Notes, V10 Reg F changes will include Document Variables that will help you create your Validation Notice. These variables can be found in the Claim Group of Variables and they are as follows:
For the selected Itemization:
Itemization date: CMIIDATE
Itemization Balance: CMIAMOUNT
Itemization Fee Charges: CMIFEECHGS
Itemization Interest Charges: CMIINTCHGS
Itemization Credits: CMICREDITS
Itemization Debits: CMIDEBITS
Itemization Adjustments: CMIADJMNTS
Itemization Creditor: CMICREDTOR
Note: The above variables will pull information from the selected Claim Itemization row only. If none are selected, the document variables will not import any data into the document.
For the Most Recent Dated Itemization: (Itemization with the date closest to today's date)
Itemization date: CMIRIDATE
Itemization Balance: CMIRAMOUNT
Itemization Fee Charges: CMIRFEECHG
Itemization Interest Charges: CMIRINTCHG
Itemization Credits: CMIRCREDIT
Itemization Debits: CMIRDEBITS
Itemization Adjustments: CMIRADJMNT
Itemization Creditor: CMIRCREDTR
For the Validation Deadline Date:
Dispute by date: CMIVALDATE
Note: You may need to create some formula variables using these Reg F variables to get the required information for the validation notice. See Creating_Formula_Variables for information on how to create a formula or contact Support.
Use the following links for information about how to create a form using a template like those provided by the CFPB.
For information on creating a Word Form, see How_to_Create_a_Word_Court_Form
For information on creating a Word Perfect Form, see How_to_Create_a_Word_Perfect_Court_Form
The following are Itemization specific variables that will only return values for that Itemization regardless of which Itemization is selected or which Itemization has the most recent date.
Itemization Date: CMICIDATE
Itemization Balance: CMICAMOUNT
Itemization Fee Charges: CMICFEECHG
Itemization Interest Charges: CMICINTCHG
Itemization Credits: CMICCREDIT
Itemization Debits: CMICDEBITS
Itemization Adjustments: CMICADJMNT
Itemization Creditor: CMICCREDTR
Itemization Date: CMISIDATE
Itemization Balance: CMISAMOUNT
Itemization Fee Charges: CMISFEECHG
Itemization Interest Charges: CMISINTCHG
Itemization Credits: CMISCREDIT
Itemization Debits: CMISDEBITS
Itemization Adjustments: CMISADJMNT
Itemization Creditor: CMISCREDTR
Itemization Date: CMIPIDATE
Itemization Balance: CMIPAMOUNT
Itemization Fee Charges: CMIPFEECHG
Itemization Interest Charges: CMIPINTCHG
Itemization Credits: CMIPCREDIT
Itemization Debits: CMIPDEBITS
Itemization Adjustments: CMIPADJMNT
Itemization Creditor: CMIPCREDTR
Itemization Date: CMITIDATE
Itemization Balance: CMITAMOUNT
Itemization Fee Charges: CMITFEECHG
Itemization Interest Charges: CMITINTCHG
Itemization Credits: CMITCREDIT
Itemization Debits: CMITDEBITS
Itemization Adjustments: CMITADJMNT
Itemization Creditor: CMITCREDTR
Itemization Date: CMIJIDATE
Itemization Balance: CMIJAMOUNT
Itemization Fee Charges: CMIJFEECHG
Itemization Interest Charges: CMIJINTCHG
Itemization Credits: CMIJCREDIT
Itemization Debits: CMIJDEBITS
Itemization Adjustments: CMIJADJMNT
Itemization Creditor: CMIJCREDTR
The Reg F changes will also allow you to track opt in and/or outs for emails and texts with the associated dates.
To view the Email and Text Opt In and Opt Out settings, click the button to display a selection menu
To display the Opt In/Out Screen.

Note: This screen is Consumer/Debtor specific. Please be sure you have are aligned to the correct Consumer/Debtor before pulling up the Reg F Opt In/Out screen.
If there is an email address on the consumer/debtor tab, it will be listed under Email. There will be options to Opt In with the date and Opt Out with a date.
Check the box next to the Opt In or Out as needed and enter the date. You can opt in/out without entering a date.
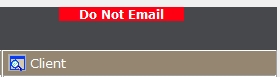
If selecting the Opt Out checkbox and the system option is set to display the Do Not Email flash message, a Do Not Email flash message will be displayed at the top of CollectMax once you refresh the account.
After making any changes, click the  button to save your Options.
To turn on the Do Not Email flash message when an email is set to opt out, go to System, System Options
to display the System Options screen.
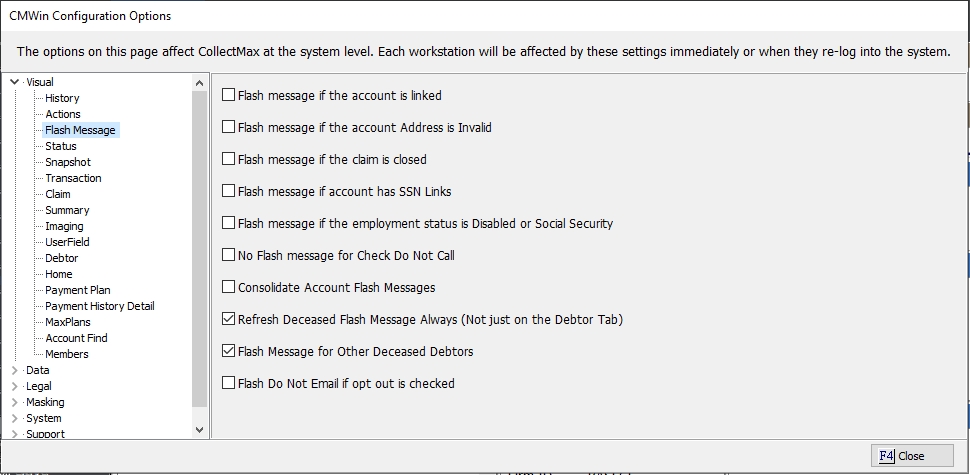
Under Visual, select Flash Message and then check the box next to the 'Flash Do Not Email if opt out is checked' option. After selecting this option, user will have to exit and comeback into CollectMax for the change to take effect and the flash to appear.
Note: Please review your accounts for the Email Opt Out setting prior to turning this feature on. If your firm has not been updating that field regularly, you might find the Flash Message flashing erroneously and you may want to update the accounts before adding the flash.
You can also access the Reg F Opt In/Out Screen, by clicking the Email Opt Out checkbox in the Debtor Information section of the consumer/debtor tab.

Selecting or deselecting the Email Opt Out checkbox will pop-up the new Reg F Opt In/Out Screen.
Make the changes to the Options and click the button to save the changes on the Reg F screen only.
Note: Because you have also made any changes to the Debtor Information Opt Out checkbox, you will need to click the  button to save that option. Failing to do so will result in the changes made both on the Debtor Information Section and the Reg F screen to revert to the original setting before the change.
If the Debtor has any current or alternate phone numbers, they will be displayed on the Opt In/Out Screen.
There are options for Do Not Call and Text Opt Ins and Opt Outs with dates for each number. You can update these settings for each phone number on this screen. Check the box next to the Do Not Call or Texting Opt In or Out as needed and enter the date. You can select opt in/out without entering a date.
The phone number will be automatically updated in the alternate screen if selecting Do Not Call
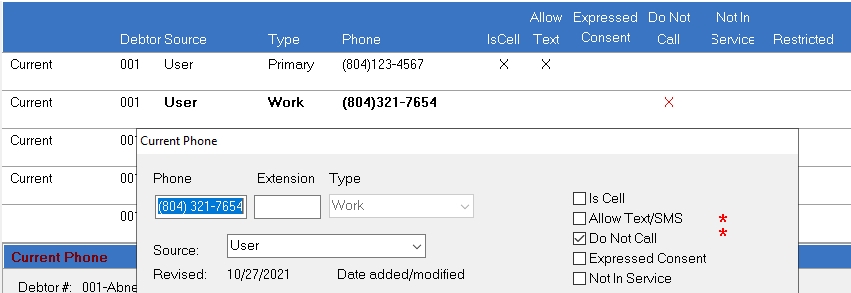
and a Check Do Not Calls flash message will be displayed at the top of CollectMax.

If selecting the Texting Opt In checkbox, the phone number Allow Text option will be selected in the alternate phone screen automatically.
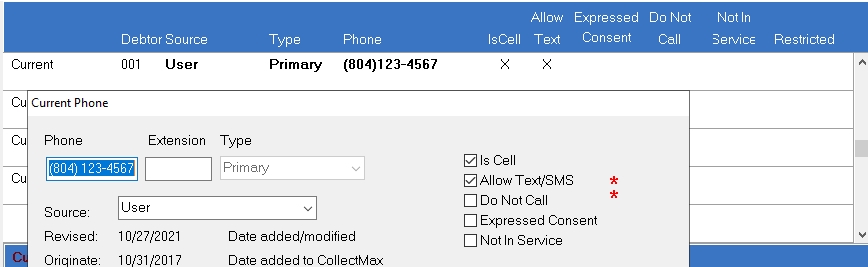
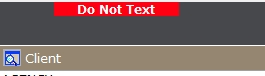
If selecting the Texting Opt Out checkbox, a Do Not Text flash message will be displayed at the top of CollectMax.
Make the changes to the Options and click the button to save the changes
You can also access the Opt In/Out Screen, by clicking the Do Not Call or Allow Text check boxes on the Alternate Phone Screen.

When you select either the Do Not Call or the Allow Text/SMS checkboxes, the Reg F Opt In/Out screen will be displayed where you can edit the Do Not Call or Texting Opt In. This will also update the Alternate Phone Number screen as above.
The following Variables are available at the Debtor Level for the Opt In and Out Fields for the current phone number:
Note: There currently are no Opt In or Opt Out variables for the alternate phone numbers.
Email Opt In: DEEMOPTIN
Email Opt In Date: DEEMOIDATE
Email Opt Out: DEEMOPTOUT
Email Opt Out Date: DEEMOODATE
Debtor Phone 1 Opt In: DEPHONE1OI
Debtor Phone 1 Opt In Date: DEPH1OIDT
Debtor Phone 1 Opt Out: DEPHONE1OO
Debtor Phone 1 Opt Out Date: DEPH1OODT
Debtor Phone 2 Opt In: DEPHONE2OI
Debtor Phone 2 Opt In Date: DEPH2OIDT
Debtor Phone 2 Opt Out: DEPHONE2OO
Debtor Phone 2 Opt Out Date: DEPH2OODT
Debtor Phone 3 Opt In: DEPHONE3OI
Debtor Phone 3 Opt In Date: DEPH3OIDT
Debtor Phone 3 Opt Out: DEPHONE3OO
Debtor Phone 3 Opt Out Date: DEPH3OODT
Debtor Phone Fax Opt In: DEFAXOI
Debtor Phone Fax Opt In Date: DEFAXOIDT
Debtor Phone Fax Opt Out: DEFAXOO
Debtor Phone Fax Opt Out Date: DEFAXOODT
MaxExtract can now extract the Reg F Claim Itemization Fields & Opt In/Out Fields. The Claim Itemization Fields are at the Claim Level and Reg F Itemization Screen. The Opt In/Out Fields are at the Debtor Level and there is a selection for Email, Home, Work, Cell and Fax Opt In/Out and Opt In/Out Dates.
For Information about Reg F fields for the MaxUpdater, please see MaxUpdater for Regulation F. Not all fields V10 Reg F fields have been added but will be coming soon. Please follow Release Notes for information about MaxUpdater changes.
Note: The Version 10 Regulation F changes do not include call masking. Those features will be included in MaxSecurityPlus. For information on obtaining this feature when available, please contact Sales.